Monday, September 22, 2008

Acrylics as Watercolors, More

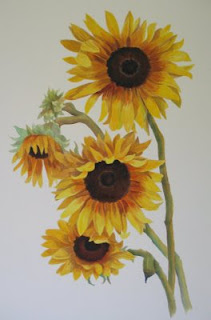
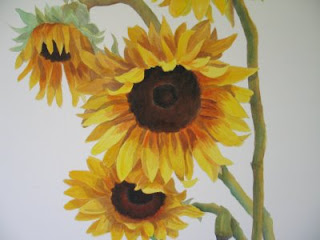
Birds of Paradise, acrylics on watercolor paper, 13.5" x 18.5"

This is the last of my experimental pieces, exploring the use of thin "watercolor" layers on watercolor paper, using the acrylic paints. For now, anyway. It's a very time consuming process. I've leanred more, and have added a couple more notes on the list of handling these. I waited too long to do my incised lines in the leaves, the color had already sealed in the paper, so I learned that incising lines must be done early on in the layering stages. I also learned here that the blending and lifting technqieus that we normally use in watercolors can be done, but must be done in the first or second layer. You can lift the paint, blot the paper, bleed two colors, but the paint DOES act a lot differently, and you have to be even more quick in these techniques than you would with watercolors. You CAN get really rich and vivid color though, and it's nice to be able to have a black background, or to build up really nice deep colors. And that's it, so far.
Saturday, September 20, 2008

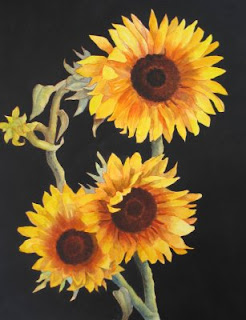
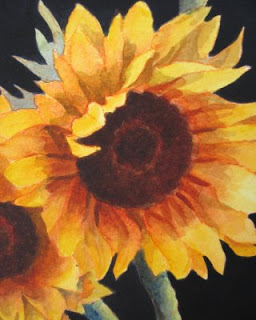
Acrylics as Watercolors


Two Sunflowers paintings with their details. These were done as watercolors, using very thin layers of acrylic paint, on watercolor paper. The colors were actually paler and thinner than what I generally use for my watercolors, but to avoid shine, I kept the acrylic layers very watery. This is a new technique for me, so I kept some running notes, which I'm copying here for anyone interested in trying this technique. It's pretty fussy, for when you are in the mood to do details, not splashy.

- Have two pieces going to allow each to dry while working on the other.
- A butcher's tray works great for mixing and for cleanup.
- Just use an old bristle brush to scrub the old paint away and mop up with paper towels.
- Small amounts of paint, less waste, they will dry up, or crumble.
- Don't go "acrylic", keep glazes very thin, or it will shine.
- Spray paints often, keep brushes rinsed.
- Drying time between layers decreases as more "sealing" is added, more layers.
- Watch out for the little "curds" or flakes of dryed paint, they seal into the layer.
- Don't use watercolor pencil (see black detail) for original drawing, since it doesn't quite dilute.
- Use graphite pencil for the original detailed and careful drawing.
- For the opaque black, count on at least seven layers.
- Dry completely between layers, or it'll pick up.
- After several layers, the acrylics stop acting like watercolors (blending on the paper), then you switch to a poster paint or graphics mentality. The paper gets "sealed up" I think.
- Incised lines should be done early on, during the wet paper stage of the first layers.
- You can use blending and lifting techniques only during the first several layers. So paint carefully in the first stages, blotting and blending as you normally would.

And that's my notes for these two paintings. I like the technique, came across it used in an acrylics book, paintings done by Barbara Buer, just exquisite things. More about this process as I do more paintings with it.

Thursday, September 18, 2008

Poppies, Second Generation

Poppies, Second Generation
Oil on Canvas Panel, 11" x 14"
Available at $45.00 plus shipping
Since I had a lot of mixed colors leftover from the large poppy paintings, I decided to do a small painting to use some of them up. How tough could it be, right? Actually, the larger paintings were easier to do than this one, and as I'm trying to figure that out, it occurs to me that when you have less space to work in, the composition has to be tighter. I think. Any ideas or experiences? Thanks for looking.

Wednesday, September 17, 2008

Painting Pink Poppies Large


I have completed a set of two oil paintings of pink poppies, (see several posts below) and given the posts of the process, step by step, below. I had originally put this notice at the first (last) post, but as all you bloggers know, you have to type and post in reverse order. So now I can say "below."

Steps One and Two: The commission, Preparation, Planning, Collecting.

This is actually where the main work occurs. The request is made, and sizes are determined, colors and subject matter are chosen by the collector. You order your canvas, get color swatches from the collector, start looking for reference photos online, start playing with colors and shapes, thumbnails and watercolors. I sent my lady a couple of ideas, and she gave me good, clear directions about her color choices. She chose the pinkish-oranges, taupe, ivory and greens. Since I would have reached (and did in the sketching stage), for the blues and purples, it was good to know she didn't love those two colors. I ordered some pink oil paints and got a couple of large tubes of white. Then I procrastinated. For a long time. The collector was sooooo understanding. Then I got tired of knowing I still needed to get to these, and did them. Yay!

Step Three: Finalizing the Plan

Step Three: The color scheme is finalized.

I hear back from the collector on colors she prefers, and do another shape sketch, still playing around with the overall arrangement. She has requested the poppy color (pinkish peachy) and has sent me color swatches early on, and has chosen after some thought: taupe, ivory and greens to complement the peachy color of the poppies. This was a wonderful combination that I would not have thought of, so I was excited to work with this set of colors. Taupe? What's the color you think of? I think every person has a different concept of those subtle, unusual colors.

Steps Four and Five: Draw and Block In

Steps Four and Five: Drawing and Blocking In

Here I've used vine charcoal to do the drawing directly onto the canvas. I have the idea of the triangle (overall shapes for the set) in the back of my head, and I use various references, photos from google and wet canvas to give me the shapes and configurations of the various flower heads. The charcoal is easily wiped away with a paper towel, so it makes it easy to change my mind when I need to move a guy here or there. Normally, at this point, I would use a spray fixative on the canvas, but since I didn't have any, I just went over the charcoal marks with OMS to seal and dilute them. Once the drawing is done, I start to overpaint behind the flowers with very thin paint, mostly to see how the arrangement will look from a distance. I can still change things easily at this point.

Step Six: Start Painting Background

Step Six: Roughing in the Background.
I start with a large batch of ivory mixed, and then move from there, adding swishes of taupes, sienna, greens. This goes over the washes I've already put in. I'm not really worried at this point about accuracy, and I want to keep the flavor very loose overall, so I really do "swish" with a large and medium size brushes.

Step Seven: Paint Poppies


Step Seven: I paint all the poppies. This is the most time consuming step, and I bounce from canvas to canvas, and alternate some background work between poppies. I give myself a break between every two poppies, and go out of the studio, so I'll try to keep fresh eyes. I keep my color swatches handy to refer to, so I won't get too far off the predominant colors I want.


Pink Poppies Finished


Pink Poppies, Oil on Stretched Canvases, 24" x 24" Each

Steps Eight, Nine and Ten: (finishing)

Finishing touches, flowers, background and overall. I stand back from the paintings set together, and see where anything needs to be fixed, adjusted, some spot that's too mushy or dark. Somewhere a color needs to be balanced. I also add a few touches of bright red and orange, just because it needs a pop here and there.

Saturday, September 13, 2008

Bugs and Peanuts


Since all my art supplies for my daily painting were packed away, to make room on my tables to put boxes up and off the floor (anticipating some flooding from Ike), I played with my pen and inks, some pencils and watercolors to do some small sketches. The EDM challenge last week was "peanuts" and so I did a few sketches of those. The kids have been collecting dead bugs for me for awhile, thinking that I'd like to paint them, so I did a few of those as well. Click on any image to see it larger.


Related Posts with Thumbnails